Saturday, August 27, 2011

Starting New Baby Gift Set

Here is the start of my next baby gift set: a blue baby hat and socks -

I will work on the blanket and post that as well, but I'm curious to see what kind of box I can find to put the gift set in. There really aren't a lot of choices that I've found for a baby boy gift box. Anyone know of where I might find something suitable?


I am also going to put a different design on this blanket instead of the one I used for the baby girl blankie. New pictures to follow soon!

Sunday, August 21, 2011

Up Up and Away!!

In my beautiful, my beautiful hot air balloon!


Out here in Hunterdon County, NJ it is not an uncommon sight to see a multicolored hot air balloon drifting by on a summer's day.So I thought, why can't I knit a sculptural balloon to "float" on the wall inside the house?


I will have the directions on how to make this one in my upcoming book, but I basically used the yellow round loom with 5 Red Heart yarns. It was a challenge keeping them all tangle free, but I was able to do it with a little bit of practice. The basket was knit using Hometown USA yarn on the flower loom.


Once I completed the knitting, I covered one of my daughter's toy balls in a plastic bag. Next I stretched the balloon over the ball.

Then, using Sta-Flo liquid starch straight from the bottle, I painted the balloon.


I had never used liquid starch on yarn before and wasn't sure how it was going to turn out. All I knew is that I wanted the yarn to be very stiff so it would look take the shape of the ball once it dried. I coated it until I thought the balloon was drenched in starch, and then let it dry overnight. The next day the outside of the balloon was stiff, but the inside was still flexible. So I coated the inside and outside with starch and set it aside to dry overnight. This stiffened it up very well, but something I hadn't counted on was that the starch would not dry 100% clear. Something else I realized after I was done was that I could have just as well dunked the balloon in the starch and then stretched it over the ball to dry. Maybe I'll try that for the next one. Anyhow, every coat of starch was making the yarn a bit duller, so I decided to stop, even though it was still not strong enough to be hung without it sagging. So I thought, why not weave some jewelry wire around the edge of the inside of the balloon? I bought 3 yards of Jewelry Essentials Stringing 12 gauge blue aluminum jewelry wire,


and carefully poked it through the outer loops of the balloon.


This worked perfectly, and I could now hang the balloon on the wall without a problem! But first, I attached the basket to the balloon by weaving the yarn through the inner loops of the balloon flap at the bottom. If you don't weave the yarn through the inner loops, it will show through on the front part of the ballon and won't look as attractive (to me anyway).


You can add your child (or grandchild) to the basket by cutting out a photo and taping it inside the front of the basket.


Or, perhaps your child might want to put a favorite action figure or doll in the basket!


This one is a miniature doll Christmas ornament that fit just perfectly.


Personalize your balloon with any color combination you want, limited only by your skill, imagination and patience!

Friday, August 12, 2011

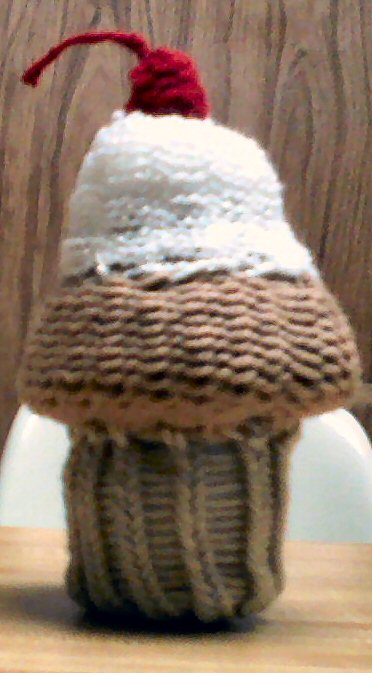
Cutest Cupcake!

Here's a cupcake that I whipped up from scratch in a jiffy, and it didn't even make the kitchen hot!

With a delicious dollop of frosting and a cherry on top, it looks good enough to eat! You can make it too! You will need your flower loom, blue round loom, spool loom, hook, yarn needle, pen, scissors, cardboard, batting, and various yarns. All stockinette 1 over 2 stitches.

To make the cup: Drawstring cast on with a light brown yarn (I used Caron Simply Soft Bone). Knit 8 rows, then cinch bottom shut. Knit 12 more rows then bind off with yarn needle. On cardboard, trace the inside of the flower loom with a pen:

Then cut out the circle on the cardboard, and put the circle inside the cup (to make the bottom of the cup stand. If the cup seems a little wobbly, you may consider taping a heavyweight metal washer to the cardboard circle. Set aside.

To make the cake: Drawstring cast on the blue round loom using a medium brown yarn (I used Loops & Threads ImpeccableTopaz).Knit off 13 rows, then cinch bottom shut. Knit off 12 more rows then bind off with yarn needle. Turn piece inside out. Trace the inside of the blue round loom onto cardboard and cut out.

You may want to cut off more from the edges if the cake overlaps the cup too much (that's what I did). Place the cardboard circle inside the cake

stuff with batting, cinch the top shut and knot. Set aside.

Next, stuff the cup with batting,

center the cake over the top of the cup, and sew the bottom of the cake onto the top of the cup:

For the frosting dollop: Regular cast on the flower loom with white yarn (I used Bernat Baby Coordinates white).Knit 15 rows, bind off, turn inside out. Carefully stretch one end and sew it onto the top of the cupcake. Stuff with batting, then cich the top of the frosting shut and knot.

For the cherry: Regular cast on the 5 peg end of the spool loom, 1 over 1, with red yarn (I used Red Heart Cherry Red - how appropriate!). Knit off 5 rows then bind off. Turn inside out and cinch one end. Instead of batting, cut some red yarn and stuff it inside the cherry. Then bind off. Braid three strands of red yarn to make the cherry stem, and sew the cherry stem to the cherry.
Sew the cherry on top of the cupcake, and voila! You're done! It took me about 2.5 hours to complete. Great for simple party favors, give as a gift, or keep it as your first no-calorie cupcake!


Sunday, August 7, 2011

Great Glowing Fireflies, Knitters!

Here is one of my favorite bugs of the summer: the firefly!

The back:

I had been mulling over this idea for some time, wondering how I would do it. I looked at photos of fireflies, chased a few and caught them to study them. I learned that there are several varieties around the world, some famous for their synchronized display! While they are complex little creatures indeed, I decided to keep it simple and made the following drawing as a guide for what I would knit:


To make the body: Using Red Heart Cherry Red and Black yarn, and the pink straight loom, starting with a drawstring cast on I knit 9 rows of 1 over 1 stockinette stitches on 14 pegs (including loom clip and corner peg). For the black yarn, I knit 24 rows. The white yarn I knit 14 rows (more details on the white yarn later). The white yarn was a thinner gauge than the Red Heart, so I had to double strand it. The body measures 12".

For the wings I used the Red Heart Black yarn and Caron Simply Soft Bone yarn, knitting a flat panel 1 over 1 stockinette stitch on 6 pegs for 33 rows. Then, by switching to all Bone yarn and moving the yarn from the outer pegs to the inner pegs 1 row at a time, I made the tapered end of the wing. Each wing measures 7.5 inches. I knew I didn't want to knit the wings so long that they covered the white yarn completely, so that's why they are a little short.

For the eyes I simply sewed the yarn 3 times over and underneath one stitch on the head., and knotted the black yarn on the inside of the head.


Fireflies are more flat than round, so instead of regular batting I cut 2 pieces of foam batting and stuffed them inside. After that I cinched the firefly's head shut.

The antennae and legs are simply braided bits of black yarn that I sewed on in the appropriate places. And I also sewed the wings on at the top under the head, and all the way down his back until I reached the white yarn, where I wanted the wings to flap freely a little bit. And voila! It's done! Here's a closeup of the bottom part of the firefly:


Oh, I almost "forgot"... it wouldn't be a firefly if it didn't GLOW!!!


The "white" yarn is actually Bernat Glow in the Dark Glow White yarn! You place it under a light for 5 minutes, and it will glow for 5 minutes in the dark! Imagine having a few fireflies hanging in your child's room! Perhaps it would be just enough of a distraction to keep him/her in bed after you turn the lights off at bedtime!

Thursday, July 28, 2011

If Not Kansas, Then It Must Be OZ!!!

She's my latest Coffee Can Doll! Here are Dorothy and Toto, about to enter the Emerald City with their friends!!

No, I didn't knit or create the Cowardly Lion, Tin Woodsman, or Scarecrow in the background. But I did knit Dorothy's dress:

Since the details on how to create her will be in my upcoming book about all my coffee can dolls, I will only give a few details here. I call them coffee can dolls because under each doll's dress is a coffee can. I used the Knifty Knitter round looms to create the dress, painstakingly alternating the Red Heart Super Saver Spa Blue and White yarns to create the gingham-inspired pattern. I decided not to include the ruby slippers for her feet, partly because she doesn't have any feet! But also because I didn't think they would look right poking out from under the front of the dress. And in the original story the slippers aren't red; they're silver. I wanted her to be a combination of the "Dorothys" we have come to know and love on the silver screen, not just focusing on a particular one or accurately following her description in Frank Baum's book.

I used some brown yarn from my stash on the spool loom to create Toto's basket, seen here from various angles:


It took me awhile to find a dog that would be recognizable as Toto. I went to crafts stores, searched online, even considered sculpting my own Toto out of clay and painting him. I would find dogs that looked like him, but they were the wrong size. Finally, we were perusing a local Christmas ornament store that had just opened, and I found him nestled inside a Christmas stocking. He was just the right size, the right look, and everything! So I bought him, removed him from the stocking and twisted off the hook from his head. With a marker I carefully painted over the hole to match the color of his fur.

For my Emerald City, I paid homage to the movie and added a little of my own ideas about the city:

And yes, me being the detail-oriented person that I am, I individually drew and shaded every brick on the yellow brick road, even though I knew much of my hard work wouldn't be visible in the photos I took. I made them all different sizes, and drew them in perspective so that the further away they were, the smaller they were. Here's a close-up look:

It was a happy accident when I took the outdoor photos that the sun was shining in the direction that I had shaded the bricks.

So long, Dorothy! May you ever be enchanted by the spirit of whimsy as you follow the yellow brick road to your dreams!


Thursday, July 21, 2011

Baby Blankie Gift Set!

Here is the complete baby blankie gift set, at last!


But first, to complete the baby blankie, I blocked it, taking care not to stretch it too much so it would keep it's shape:


After blocking, the blankie measured 24"x30". Next I pinned the blankie to a large piece of pink flannel and carefully cut out the flannel around it. With Coats and Clark pink thread, I painstakingly hand sewed the blankie to the flannel around the outer edges. I made sure to sew every loose bit of yarn onto the flannel around the edges so it wouldn't snag.

Then I pinned a pattern on the flannel side of the blankie and carefully sewed the flannel to the blankie according to the pattern I made. First I pinned about 2" in from the edges to create a box, and sewed that. Next, to make the center x pattern, I lay strips of paper down diagonally until a straight line is formed, and then stuck the strips of paper to the flannel using post-its (regular tape would fray the flannel too much when you pull it off). Then I pinned along the edge of the paper strips to create the line, removed the strips and sewed along the edge of the pins. This helps keep the blankie from sagging and keeps the flannel from separating from the knitting.


Finally, I arranged the hat, booties and blankie inside the box that I bought from a local craft store (Michael's). It has a magnetic strip on the top flap that keeps the box closed.

I'm thrilled with the way that it came out, and I have already started working on a blue gift set!

Friday, July 15, 2011

Engaging Interviews with Fellow Knitters!

I've been having some problems with my computer photo editing software, but I hope to have it corrected soon so I can post the photos of the complete baby gift set!

In the meantime, I’d like to introduce you to two outstanding fiber artists: Michael Leach, who is on a fascinating two year quest to master the art of knitting and crocheting. Prior to his quest, he never knit a stitch in his life! Also, meet Dino Foxx, an expert at yarn bombing, which is the art of transforming ordinary objects into extraordinary art by covering them with knitted yarn. It's a fast growing art form!

You will certainly gain a new perspective about yarn by meeting these two men, and I enjoyed interviewing them both! You can read all about them and see pictures of their work at http://www.creativehelps.com/interviews_4.htm.